Record players can be a bit of an enigma, at their simplest they are incredibly basic machines, but their complexity can actually become incredibly confusing when deciding between different models. As records are an analog medium there is effectively an infinite amount of quality that can be extracted from their grooves by a turntable and every component of the turntable plays its own unique role in this, so a turntable must be considered as a sum of its components.
In no particular order of importance this blog post will lay out all the components of a turntable, their role and what makes a good or bad version of that component.
Platter:
The platter is the place where your record sits, it rotates at either a constant 33 and a third rpm or 45 rpm (rotations per minute). The ideal platter should have 3 qualities, weight, balance and resonance / vibration reduction.
- A heavier platter will maintain its rotational speed more accurately, this is because the greater mass an object has the greater inertia it has when moving rotationally.
- Balance is important because this ensures overall rotational accuracy, an unbalanced platter will not rotate at a consistent speed.
- Resonance and vibration reduction are important because the the stylus is designed to pick up vibrations (we will get into this later) so any vibration that is not absorbed by the platter and the rest of the record player will be recorded by the stylus and this will reflect in playback
So how do we achieve these properties?
More premium turntables will use heavy metal or glass platters instead of plastic, MDF or low density metal platters because these are heavier materials that thus maintain a more stable rotational speed.
For heavy metal platters these often utilise a damping material like an acoustic foam or rubber on the underside to further reduce vibrations as well as adding more rotational mass.
These platters on premium record players will be made to very strict tolerances to ensure rotational balance.
Some premium players also use an acrylic platter, these are CNC’d out of a block of acrylic meaning that as well as being heavy they are also incredibly precise and thus have excellent balance. Acrylic also has a very similar resonant frequency to vinyl meaning that it can absorb and cancel out any resonant frequencies present in the vinyl, this is also possible as records can be placed directly onto acrylic platters without damage thus eliminating the platter mat (we will talk about this next) and thus allowing for direct contact with the vinyl record.
Platter Mat
This sits between your turntable platter and the record itself. They serve a few main purposes, firstly they protect your record from scuffs and scratches, secondly they provide grip and thirdly if you are djing (note scratching and back cueing can ONLY be done on DJ style turntables with styli that are designed for this) the platter mat acts as a “slipmat” which allows the record to spin independent of the platter.
Turntable mats are a very subjective field and there is very little consensus on what is best, we cover the differences between them in our turntable upgrade guide here.
Plinth
This is the main body of the record player, most plinths are made of some sort of wood or metal, the plinth's main job is to hold all of the other components such as the motor, platter bearing and other electronic components.
A good plinth should be rigid, heavy (note this does not apply to some higher end turntables that use other methods of vibration reduction) and dense. Hollow spaces should also be avoided as much as possible as these can build up resonance which can affect playback.
Feet
These sit at the base of the plinth and separate the turntable from the surface it is sitting on. They serve two main purposes, firstly they decouple the turntable from the surface it is on to avoid vibrations from the room getting into the turntable and then being picked up by the stylus. Secondly they act to level the turntable, higher end models will often have adjustable feet which can screw in and out to allow for levelling of the turntable even if the surface it is on is not flat.
Ideally the feet of the turntable themselves should also be fairly heavy which will add greater stability and further reduce and deaden vibrations. Often this is achieved by making them out of metal or adding some other form of weighting.
Motor
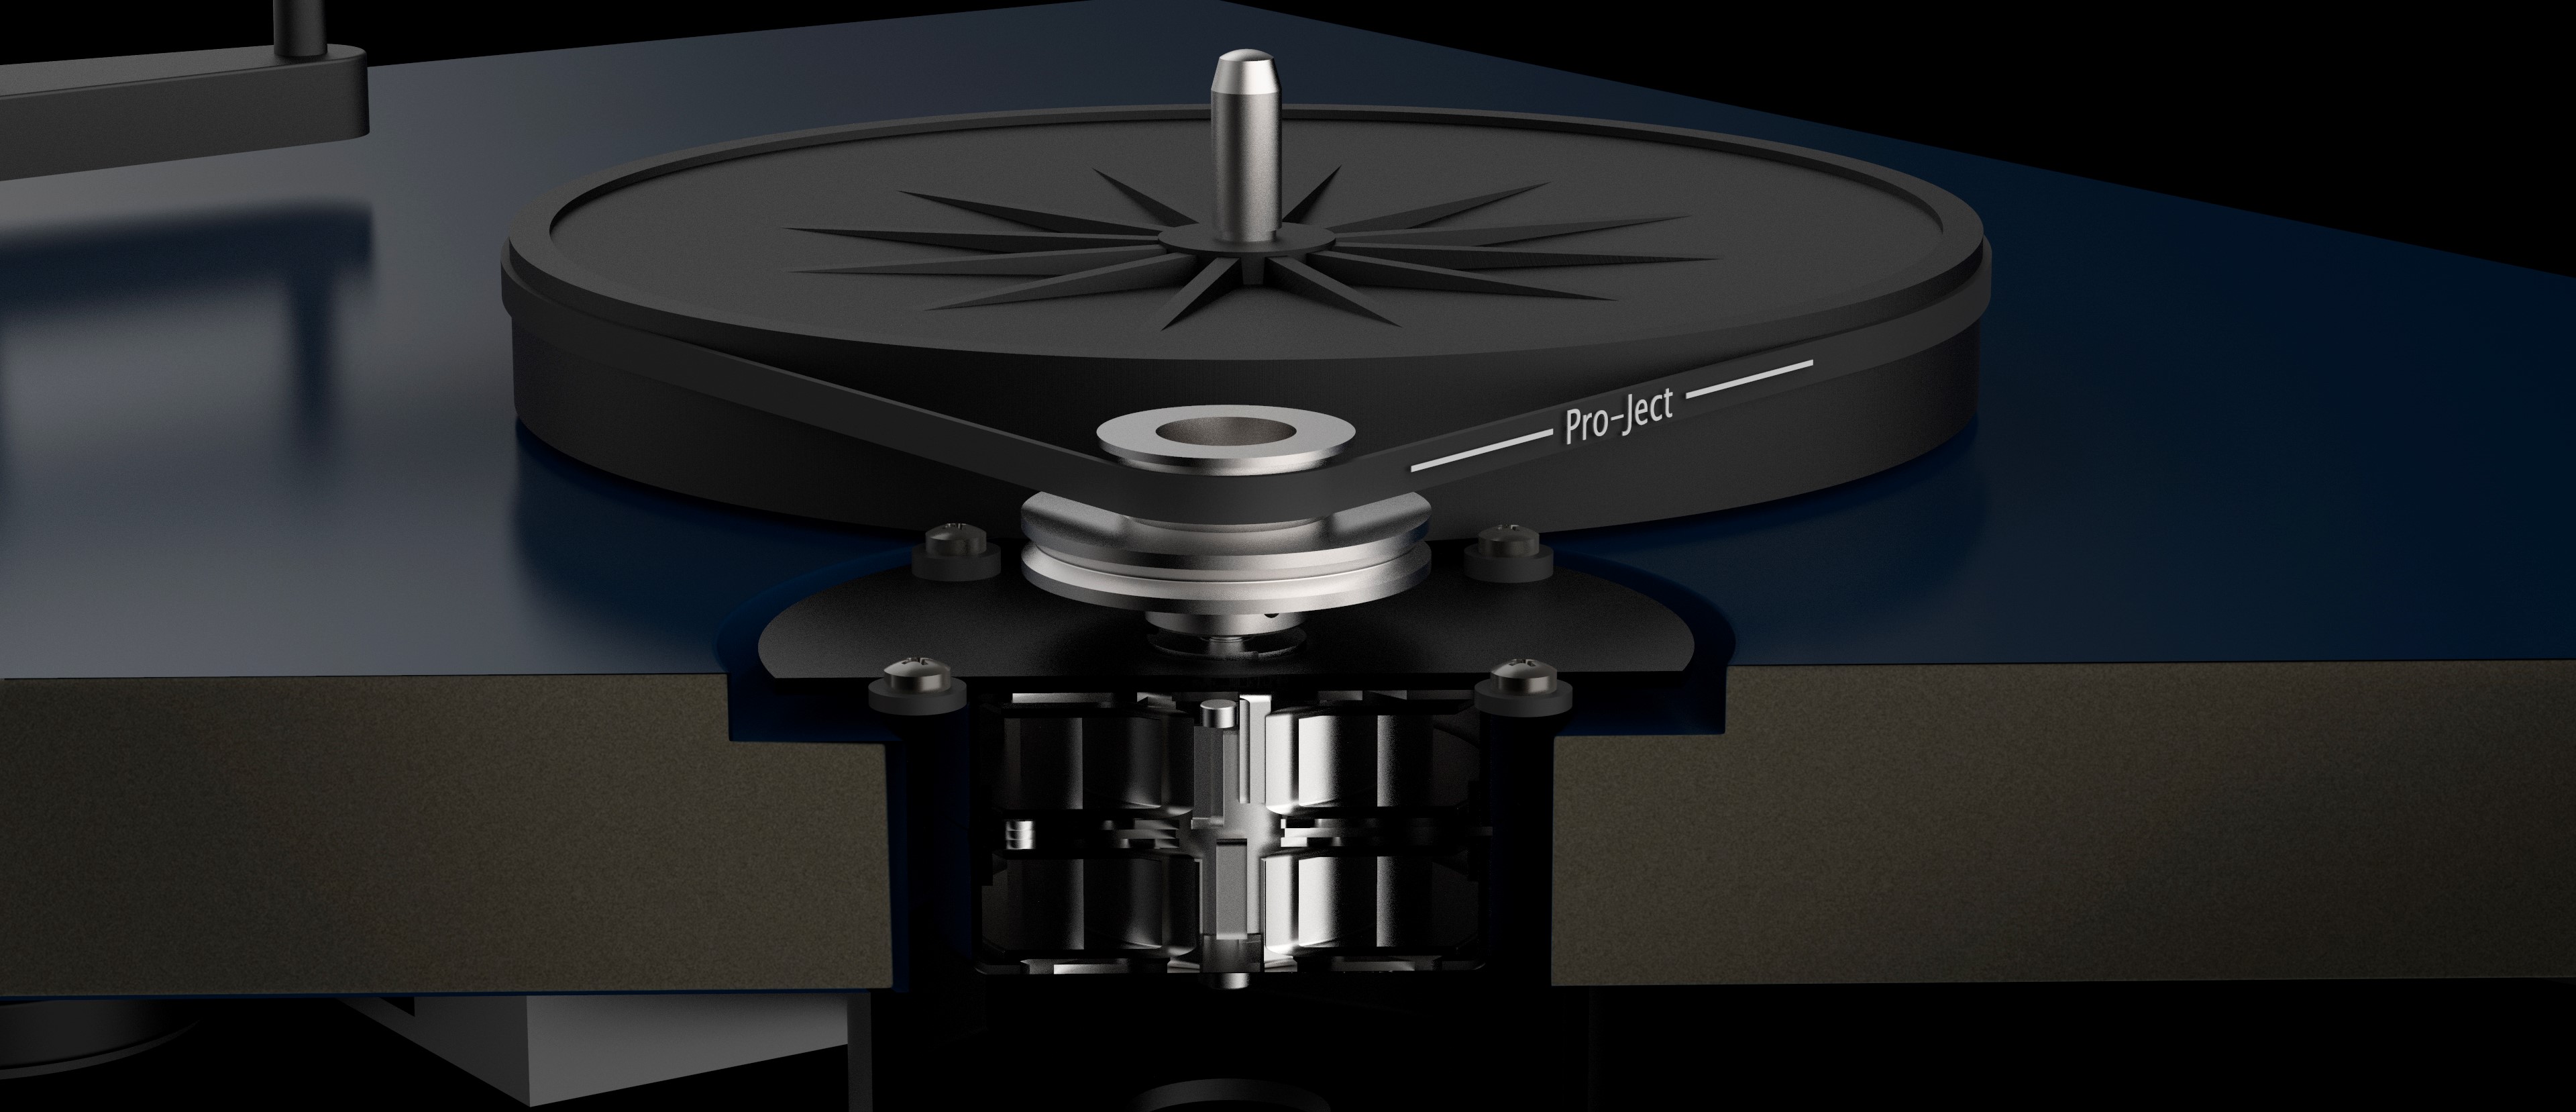
The motor is an often overlooked component of a record player despite the fact that it is such a crucial part of the system. If your motor doesn’t work then your records won't spin meaning no playback will occur.
The motor also brings with it the question of drive type. There are two ways to transfer the movement of the motor to the platter; belt drive and direct drive.
Belt Drive Operation:
In a belt drive turntable the motor is connected via a rubber belt either to the platter or sub platter of the turntable. The belt transfers this rotation of the spindle to the platter or sub platter without transferring vibrations as the rubber belt can dampen these resulting in smoother operation with reduced motor noise / rumble.
Direct Drive Operation:
In a direct drive turntable the motor is positioned directly under the platter so that the platter is rotated by the motor spindle itself. This results in higher torque and quick startup time which is ideal for DJ applications. Direct drive turntables can also be seen as lower maintenance as there is no belt to replace like on a belt drive turntable. However direct drive turntables require very precise and silent motors to operate correctly and without sacrifice to audio quality. This results in a more expensive turntable overall (if you are buying a quality direct drive turntable).
Tone arm
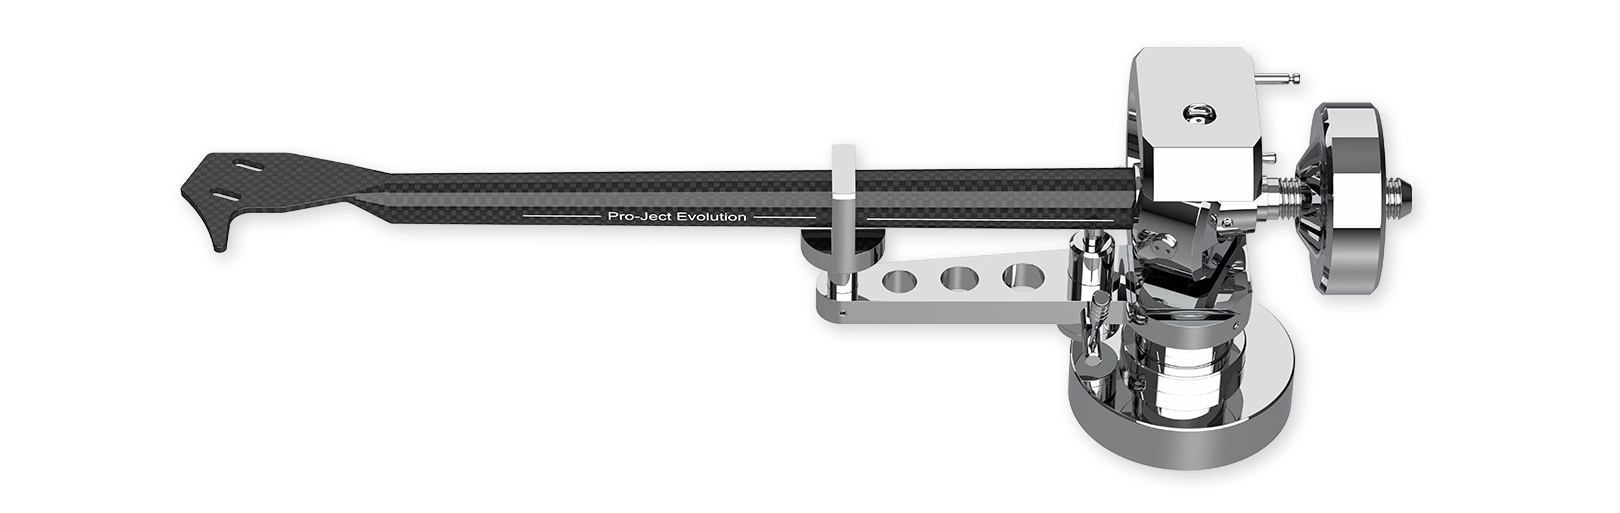
The tone arm is the long either straight or S shaped rod that pivots and holds your cartridge and stylus. These can be made from a number of materials and in a couple of different shapes as well as many lengths, as it acts as the second main motion component (alongside the turntable platter) the design and construction of the tone arm has a large impact on audio quality.
An ideal tone arm should balance lightness and rigidity, lightness is important to ensure accurate and precise tracking even on especially dynamic passages of a record. Rigidity is vital to ensure there is no play in the system as this can result in distorted playback and imprecise tracking.
There are three main designs of tonearm:

Straight:
While being the simplest design for tonearm a straight tone arm also requires very precise design for the rest of the turntable in order to be able to operate at their best. Straight tonearms require more robust anti-skate mechanisms to counteract the natural inwards force that acts against them while tracking the record spiral. The location of the pivot as well as the length of the tone arm also need to be carefully considered to ensure ideal tracking throughout record playback.
The shorter the tone arm is the less complex the anti skate needs to be, however shorter tone arms also introduce more tracking error if not properly positioned and designed. Longer tone arms have less tracking error but require more complex anti skate mechanisms as well as carrying extra weight.
Straight tone arms can offer excellent performance, however as you can now see they are a balancing act much like every other aspect of a turntable which is why we choose to carry brands with years of design excellence under their belt and thus have mastered this balance.
J Shape:
These tone arms are very similar to straight tone arms but they add a slight bend at the end of the tone arm (they can also be designed as a tone arm with a subtle curve throughout their length). This effectively allows for a longer arm to be fit into a smaller space in order to reduce tracking error. This can also result in better / easier cartridge alignment though this benefit is minor.
S Shape:
S shaped tone arms are effectively the same concept as a J shape but taken to its logical endpoint, by compressing the length of the tone arm into a curved S shape a far larger length of tone arm can be fit onto a smaller turntable body, this offers improved tracking performance and reduces tracking error even further. These tonearm shapes are most commonly seen on DJ turntables these days as their reduced tracking error makes back-cueing and scratching possible with minimal record wear.
Cue Lever

This is the small lever by the pivot of the tonearm that is used to raise and lower the tone arm, this lever is connected to a small damped lift platform that will gently raise and lower the tonearm. This smooth and gentle action is important to ensure that your stylus does not crash into your record as this can both cause damage to the record as well as your stylus.
Counterweight
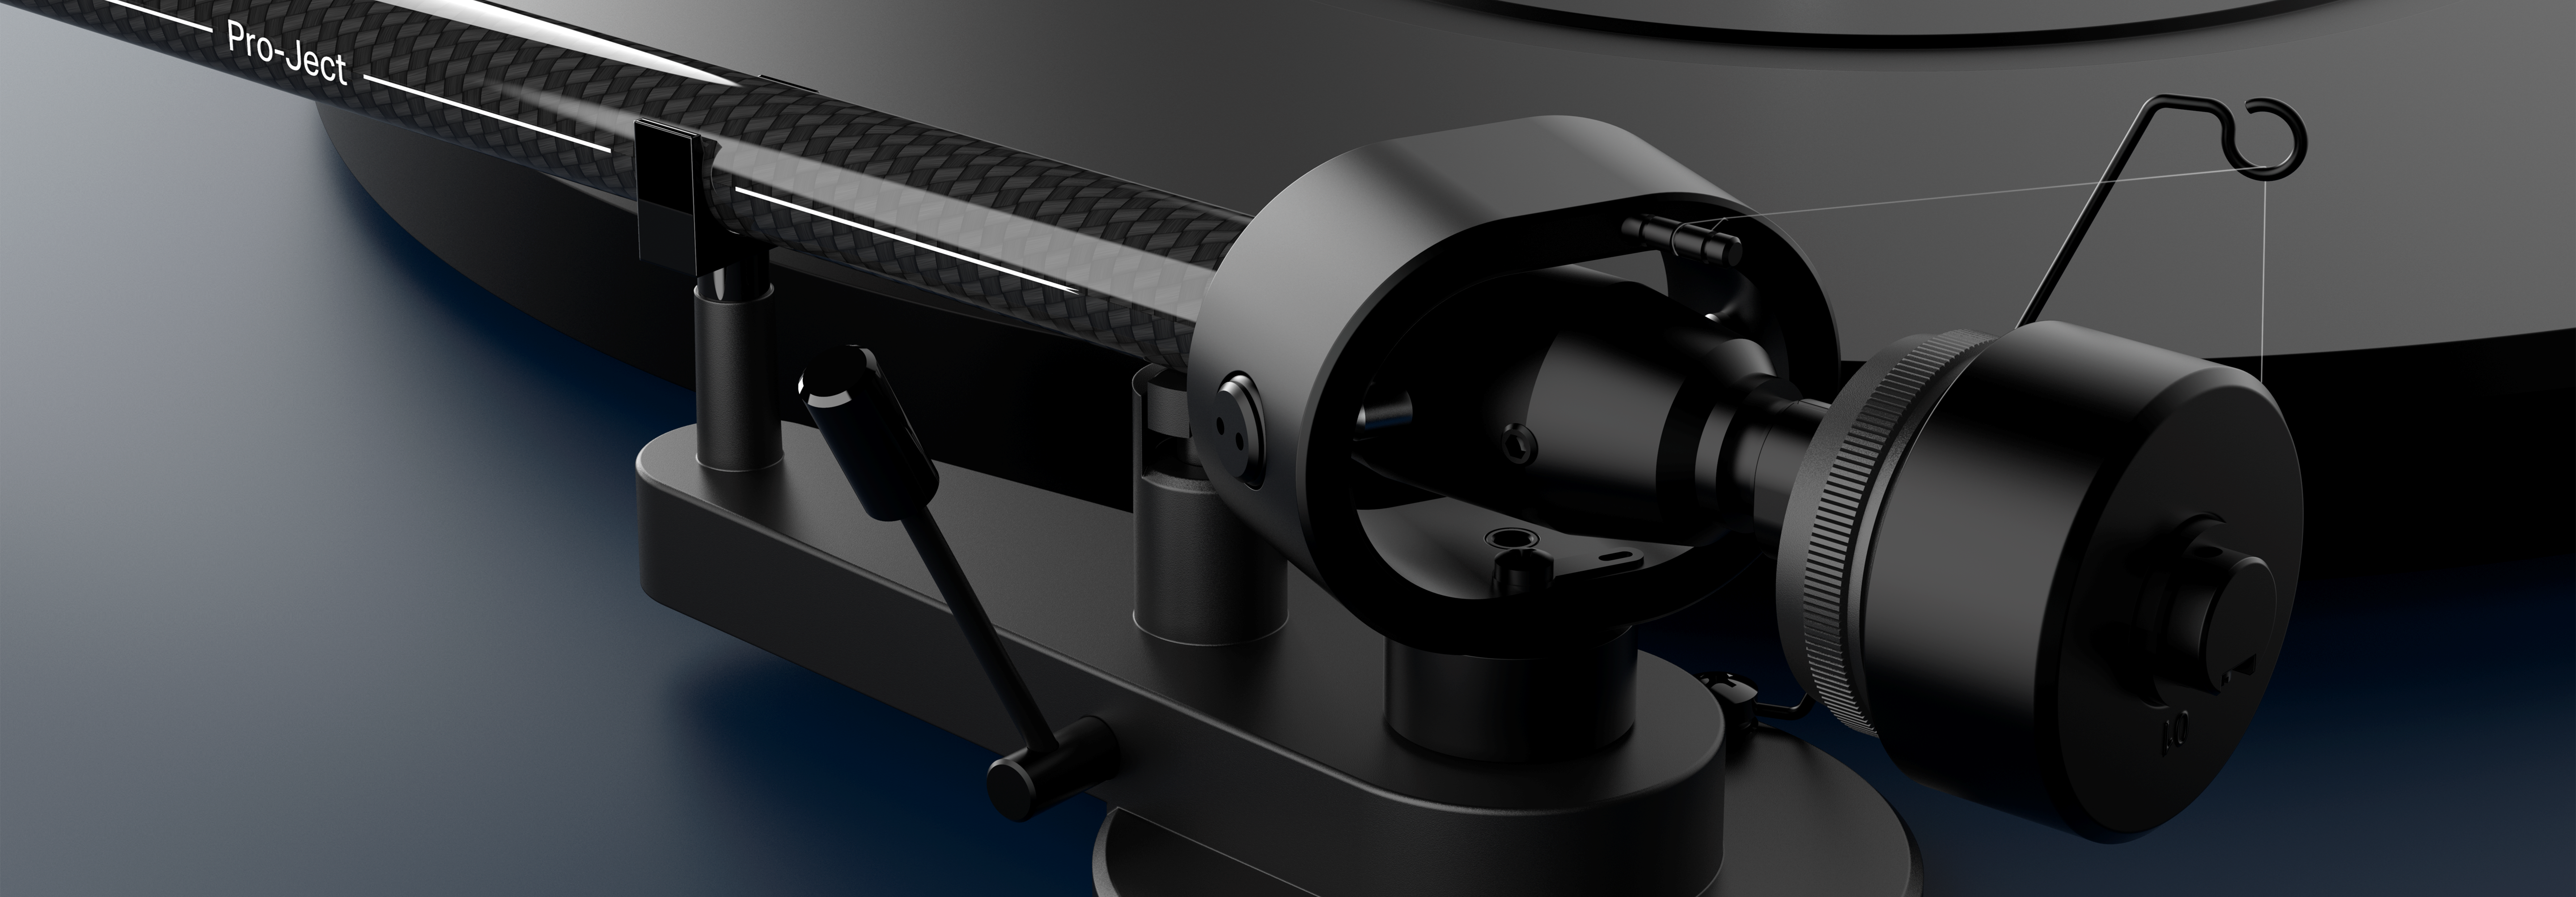
This is the metal weight attached at the opposite end of the tonearm to your stylus, it’s role is to ensure that the correct amount of force is applied by the stylus to the record, depending on your turntable this may or may not be adjustable however you should only use a turntable with a counterweight as turntables that lack a counterweight will not apply the correct amount of force which can damage your records, your stylus and result in poor playback.
Anti Skate
This can be implemented in many different forms on a turntable, either by using a small weight on a piece of thread hanging off the pivot of your turntable, using a spring loaded dial, or using a preset internal weighting. All of these achieve the same goal though, they apply a force to your tonearm that pulls out from the centre of the turntable. This force counteracts the natural inwards force that pulls the tonearm towards the centre of the record due to the spiral groove that records have. Having these two forces balance each other stops the issue known as “skating” where your needle will skip out of the grooves and just immediately skate towards the centre spindle.
Speed Control

Records come in 2 speeds these days 33 ⅓ RPM and 45 RPM, RPM stands for revolutions per minute (there are also 78rpm records but these are made of shellac and are not compatible with standard turntable styli), most record players will have some method of switching between these two speeds. This can either be electronic or manual, for manual speed change there will be a belt that is moved between two different grooves on a spindle to change the speed, for electronic speed change this will be a small switch placed somewhere on the record player.
Some higher end record players such as Rega’s Planar 3 and above choose to move this speed switching to a separate box outside the turntable as to eliminate all potential electrical noise from interfering with playback. However for the majority of premium turntables with electronic speed switching shielding is used to prevent this electrical noise from causing interference.
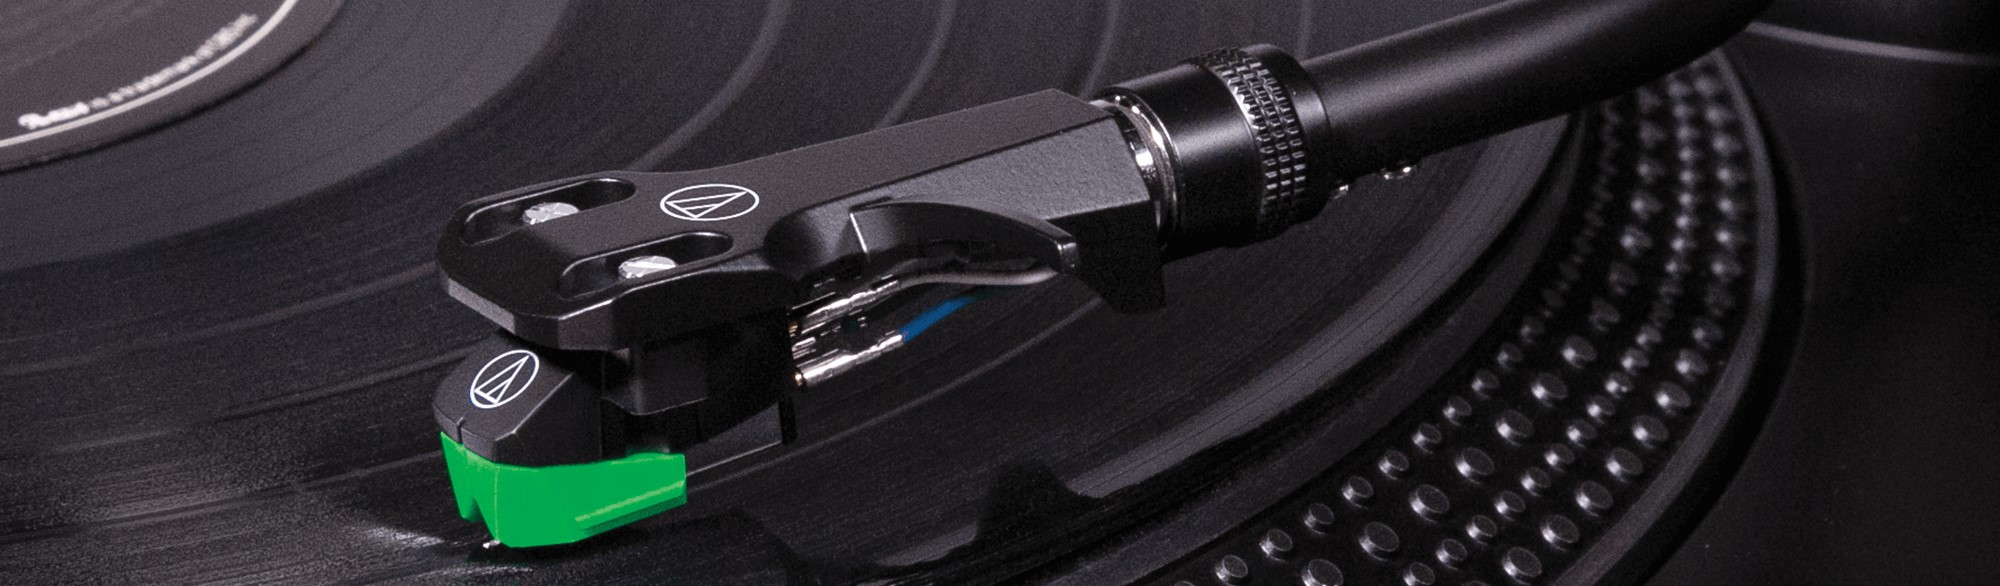
Stylus & Cartridge
We have now reached arguably the most important piece of the turntable, you may wonder why this has been placed so far down this list, I have chosen to do this so you can get an idea of how the other components affect the stylus on your turntable.
At its simplest a stylus’s job is to track the grooves of a record and vibrate according to the changing walls of the grooves. These vibrations are then turned into electrical signals as you will find out below. However your stylus is purely mechanical, meaning it is dumb, any dust, dirt or scratches on your record will be treated exactly like a groove and the stylus will vibrate accordingly and this will be added into the signal. Similarly any stray vibrations that make their way into the stylus will also be converted to electrical signals, hence all the importance placed earlier in this article on minimising vibrations and interference in other components.\
Your cartridge is the part that is screwed onto the end of your tone arm / attached to the headshell that is connected to your tonearm. The cartridge holds the stylus which is a small housing that contains a cantilever with an incredibly small diamond placed at the end of it. This diamond is what physically makes contact with the vinyl record.
This small diamond travels through the record grooves which cause it to vibrate, these vibrations travel along the cantilever and up into the cartridge body where this then moves a magnet, this magnet induces an electromagnetic field in the coil which can be sent as a tiny electrical signal along the tone arm. This electrical signal can then be sent into a phono preamp which boosts and equalises it so that finally it can be sent into your amplifier or powered speakers.
You may have picked up that I mentioned that there is a small magnet that moves, styli that operate in this manner are called moving magnet cartridges, one of their major benefits of these cartridges is that the stylus is often replaceable on its own without replacing the entire cartridge which saves cost. (Note some moving magnet cartridges still require the entire cartridge to be replaced, such as the Rega Exact and Elys 2, though this unibody design does come with performance benefits).
There is also a second style of cartridge called a moving coil cartridge, these are more expensive but come with superior audio quality when compared to moving magnet styli. These also require replacing the entire cartridge and stylus together whenever the lifespan of the stylus has been reached, many manufacturers will “retip” their moving magnet cartridges though for a more affordable price than complete replacement.
In a moving coil cartridge there is a large stationary magnet, and attached to the end of the cantilever instead of a magnet there is a small coil which moves. Because this coil is moving within a magnetic field a charge is generated within the coil which can then be sent down the tone arm.
Moving Coil cartridges benefit over moving magnet because they have a lower moving mass as their magnet is fixed, plus their moving mass (the coils) are placed far closer to the stylus giving them superior detail reproduction.
However to keep the mass low the moving coil only has a few turns, this means that they generate a much lower output than a moving magnet cartridge and thus moving coil cartridges require a special high gain phono preamplifier.
Line / Phono Output

Finally we get to the end of our turntable anatomy lesson, but once our turntable has wonderfully reproduced our record, how do we actually listen to it? 99.9% of turntables will have a pair of RCA jacks at the back of the turntable / an RCA lead coming from the turntable. However despite being the same connector 2 different signals can come through this connector, either a Line Level signal or the Phono signal. This depends on if your turntable has a built in phono stage or not and if it is being bypassed. Line level signals can be connected directly to any amplifier or powered speaker. Phono signals must be passed through a phono preamp (also known as a phono stage) first before they can be sent to a powered speaker or amplifier. Some integrated amplifiers and powered speakers have a phono stage built in, others don’t.
Please see this blog post about phono preamps Here to learn more about phono preamps.
And this post about turntable setups Here to learn more about how a phono preamp fits into your setup.